Last time i basically explained what it felt like using the GoDot engine gui while i was creating the simple game of Dont' touch the spikes. In this post i will cover how i went about setting up the scene and issues i faced.
The Scene Setup
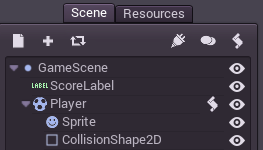
Coming from cocos2d-x i'm used to Layers, Scenes as container objects to setup a gameplay scene. In GoDot however i was unable to find any such nodes. Instead i just had to use a Node2D. This is pretty much the starting point of the game scene structure.
I then added a RigidBody2D named it Player. This was going to be the physics body for dealing with user inputs etc. I then added a Sprite to the RigidBody. If you have used unity you would start wondering where do i add the collisionbox component to the rigid body. Simple answer is .. you dont. You actually have to add a node called CollisionShape2D as a child to the RigidBody2D to be able to detect physics collisions in the simulations. So the Scene tree looks like this:
 |
| Player Setup |
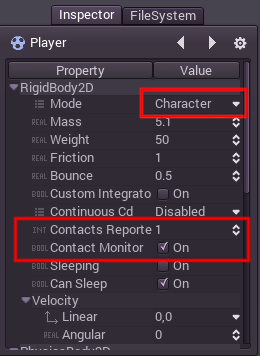
There are a bunch of things we need to start setting in properties panel corresponding to the Payer Object (RigidBody2D object) to be able to get callbacks for collisions when this body collides with static / kinetic physics bodies.
 |
| Options to set on RigidBody2D |
Once this is done, I setup static objects for top wall, bottom wall, left wall and then the right wall. These help us keep the object inside. The spikes that are in game are added as KineticBody2D. The spikes setup is a little complicated, ill' cover it in detail when i cover the animation. The one important thing that we do for spikes is set their group name. This will help us in the collision callback.
 |
| Full Scene Graph |
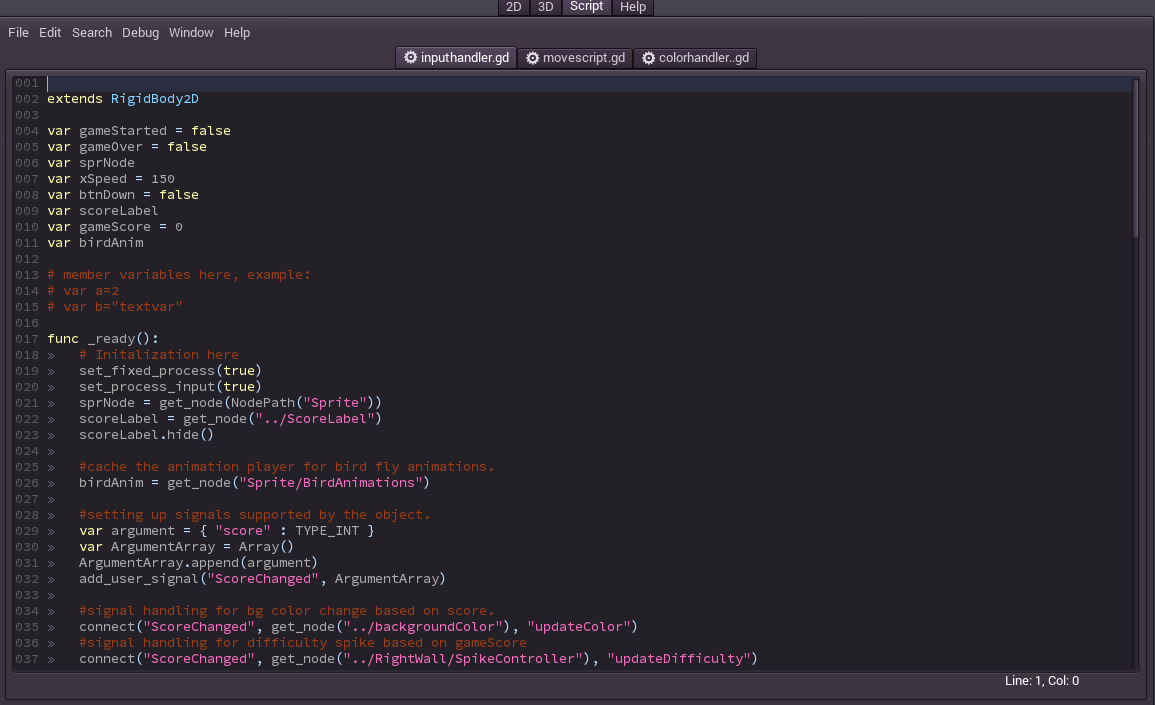
Scripting
 |
| Adding a script to a Node is Easy |
 |
| Scripting Window with Stuff filled in |
#the script associated with a RigidBody2D node.

extends RigidBody2D

# member variables here, example:
# var a=2
# var b="textvar"

func _ready():
    #initialization happens here
    pass
As you can see the _ready function is the initialization function that is created by default. its' like the OnStart function in unity behavior scripts. To get callbacks on each rendered frame i.e OnUpdate function from unity you have to call set_process(true) this will make sure that you get calls to a function named func _process(delta): this will be the equivalent of the update functions in other engines like cocos2d-x or unity.
#the script associated with a RigidBody2D node.

extends RigidBody2D

# member variables here, example:
# var a=2
# var b="textvar"

func _ready():
    #initialization happens here
    set_process(true)
    set_fixed_process(true) #callback on each physics update.
    set_process_input(true) #enables input handling
    pass

func _process(delta):
    #callback on each frame render
    pass

func _fixed_process(delta):
    #called after each physics update cycle.
    pass

func _input(event):
    #called on any input event.
    pass
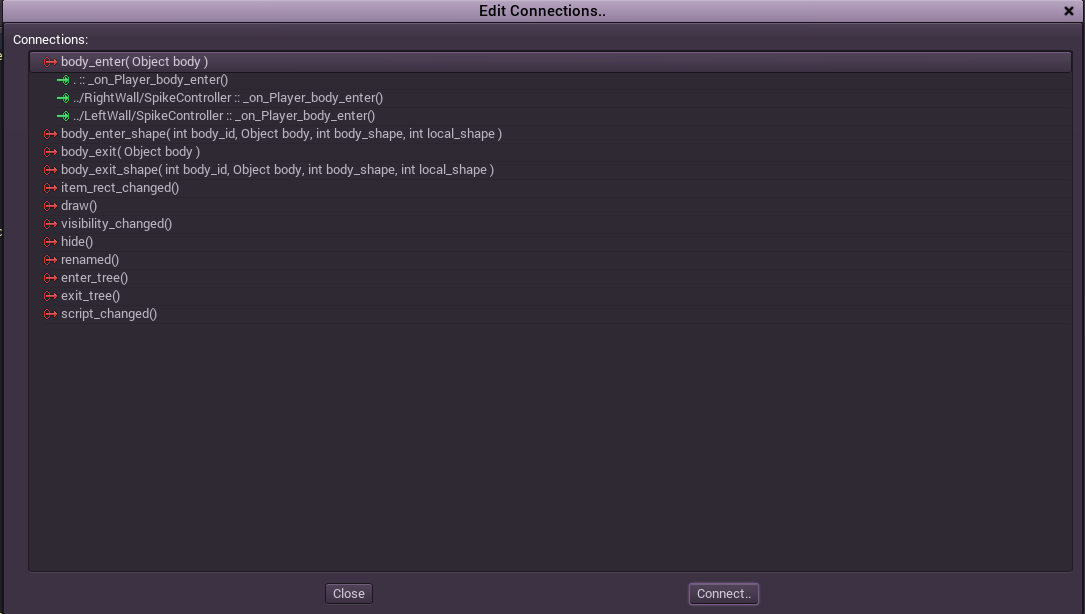
Now that we have access to the update cycles and the input events, lets' have a look at how we handle the physics collision callbacks. This is done through node connections. It's basically a observer pattern implementation similar to the one seen in Toolkits like Qt.
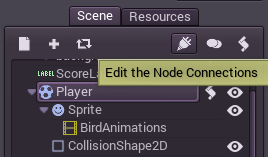 |
| Node Connections Button |
 |
| Signal List |
 |
| Callback selection window |
#the script associated with a RigidBody2D node.

extends RigidBody2D

# member variables here, example:
# var a=2
# var b="textvar"

func _ready():
    #initialization happens here
    set_process(true)
    set_fixed_process(true) #callback on each physics update.
    set_process_input(true) #enables input handling
    pass

func _process(delta):
    #callback on each frame render
    pass

func _fixed_process(delta):
    #called after each physics update cycle.
    pass

func _input(event):
    #called on any input event.
    pass

func _on_Player_body_enter( body ):
    #your implementation goes here. this is called whenever
    #Player object collides with another object.
    pass
In this case i selected the body_enter(Object body) signal from the Player node in the scene and connected it to the same node so i can handle the collision response in the same script.
This says that the signal will also emit an object of type body which is basically the handle to the object that is collided with.
This says that the signal will also emit an object of type body which is basically the handle to the object that is collided with.
Custom Signals
As i mentioned earlier, the signals / connection mechanism is very useful for communicating between multiple game objects. In this game i used it to notify the walls when ever there is a change in score to change difficulty. This enabled me to decouple the difficulty of spikes from the player handling / game handling code.
#the script associated with a RigidBody2D node.

extends RigidBody2D

# member variables here, example:
# var a=2
# var b="textvar"
var gameScore = 0

func _ready():
    ....
    #setting up signals supported by the object.
    var argument = { "score" : TYPE_INT }
    var ArgumentArray = Array()
    ArgumentArray.append(argument)
    #add the newly created signal to the list
    add_user_signal("ScoreChanged", ArgumentArray)

    #signal handling for bg color change based on score.
    connect("ScoreChanged", get_node("../backgroundColor"), "updateColor")

func _on_Player_body_enter( body ):
    #your implementation goes here. this is called whenever
    #Player object collides with another object.
    var name = body.get_name()
    if name == "LeftWall":
        gameScore += 1
        #trigger the signal that score has changed and send parameter.
        emit_signal("ScoreChanged", gameScore)
    elif name == "RightWall":
        print("Turn Left")
        gameScore += 1
        emit_signal("ScoreChanged", gameScore)
With all these things in place i was able to quickly develop the Dont' touch Spikes game in about two days' time. Most of the time i was just searching through the documentation and tutorials trying to understand the basics.I've uploaded the code to github so you can directly download and try it out.
https://github.com/vkbsb/godot_dts

Comments